Saturday, 8 October 2011

Chicken with mustard & herb lentils


In case you don’t know, October is “Vegetarian awareness month”, well certainly in America anyway. Now, I had a sort of health MOT type thing recently where I was told that my cholesterol was just outside what it should be. Of course they didn’t tell me if it was good or bad cholesterol (i.e. HDL or LDL - I won’t go into a science lesson) but it did make me think that maybe taking a month off of red meat (and so much cheese) and seeing where I would go from there, may not be such a bad thing.

So.. in honour of that, October shall be, for me “No red meat month”. It started with a salmon broth (as previously posted but this time with added mooli - yum) the other night but as I’d posted that before there didn’t seem much point in doing so again and then continued with the chicken curry, last posted. Hopefully I’ll stick to it.

So onto tonight’s post. As I said in the very first item on here (January I think) I’d been wanting to start blogging for some time. I think what ultimately made me start was a very excellent blog that I used to check religiously by a couple called Kerri & Stephen - http://dinnerdiary.org/ - that I absolutely loved. Sadly it hasn’t been updated for a while but the recipe that follows is very heavily influenced by one I found there. It’s very good.


Chicken with Mustard & Herb Lentils
Serves Two


4 skinless chicken thighs
1 onion, finely diced
1 stick celery, finely diced
1 carrot, finely diced
2 cloves garlic, crushed 
a few large sprigs rosemary, leaves chopped
large handful parsley, chopped
2 bay leaves
freshly ground black pepper
large glass of half white wine, half sherry
150g puy lentils
250ml chicken stock
2 tbsp Dijon mustard
juice of a lemon
extra chopped fresh parsley to serve

Pre-heat the oven to 180 degrees (fan) or 200 if not.

Heat a little olive oil in a heavy casserole over a fairly lowish heat (cast iron pans tend to need a lower heat than saucepans etc) and then add the chicken thighs until browned all over. Remove to a plate.

In the same pan soften the onions, celery and carrot. After about five minutes add the garlic and cook for a couple more minutes. Add the herbs and the black pepper and cook for another minute.


Add the wine/sherry mix, allowing it to bubble for a couple of minutes so that the alcohol burns off.

Thoroughly stir in the lentils then add the chicken stock and mustard and stir again.


Add the chicken to the lentils, squishing in a bit but so they’re not totally covered then put the casserole into the oven for about 35 minutes.


Check the seasoning then serve adding a good squeeze of lemon juice to each plate along with a sprinkling of parsley if you like.


Read More »

Thursday, 6 October 2011

Cà ri gà - Vietnamese chicken curry with sweet potato


Indian culinary influences are more pronounced in the South of Vietnam so consequently one finds more curries there and in the centre - that said, the curries do tend to be more stew-like with a soupier sauce than their Indian or Thai counterparts. Another difference is that unlike Indian and Southeast Asian curries, pastes are less likely to be employed and a spice powder blend is used instead. 

You can either make this yourself if so inclined or, as appears to be entirely acceptable, use a store bought Indian curry powder - Madras appears to be that used most frequently but what you do need to ensure is that it is more yellow in colour than red. A little star anise, as used in South Eastern Asian, including Vietnamese cooking quite frequently (but not generally found in Indian powders) could be ground and added to the bought powder if you like.

You’ll need to start this at least an hour and a half before you want to eat to allow for marinating time. You could, if you like use normal potatoes instead of sweet if that is all you have or can get hold of.

This is inspired by that in "Curry" and also a few other recipes I’ve seen online.


Cà ri gà
Serves 2


300g chicken thighs
1½ tbsp (heaped) Vietnamese Cari or failing that Indian curry powder
½ tsp palm sugar
½ tsp salt
1 tbsp rapeseed or groundnut oil + 2 tsp
1 medium sweet potato, peeled & cut into 1in cubes
2 medium garlic cloves, finely chopped
1 banana shallot, diced
400ml can coconut milk
100ml water
1 tsp annatto seed, ground (optional - I just happened to have some after a Mexican ingredient shop)
1 stalk lemongrass, outer leaves removed, then bruised by bashing with a rolling pin
1 large kaffir lime leaf, torn
1 tbsp fish sauce
1 large carrot, peeled and cut diagonally into 1½ - 2in long pieces


First mix together 2 heaped tsp of the curry powder with the sugar and salt in a large bowl. Add the chicken and toss well to coat then marinate for at least one hour.


When ready, heat the oil in a large pot or sauté pan over a moderate heat and brown the sweet potato pieces for about 5 minutes - you want them browned all over but not cooked through. Transfer to a kitchen paper covered plate and set aside.


Add the chicken to the oil in the pan, skin side down and cook for about 10 minutes, turning occasionally to brown all over. Again, remove and set aside on kitchen paper.

While the chicken is browning, in a separate small pan, sauté the annatto seeds in a couple of tsp of oil until they release their red colour and aroma. Remove from the heat and set aside, discarding the seeds.


Add the garlic and shallots to the large pan in which you cooked the chicken and fry for about 5 minutes until softened and lightly coloured. Add the rest of the curry powder, coconut milk, water, annatto infused oil if using, lemongrass, lime leaf, fish sauce and carrots. Mix and cook for about 1 minute before returning the chicken and sweet potato to the pan.

Bring to the boil again then reduce the heat, cover and simmer for a further 20-30 minutes so the chicken is cooked through and the sweet potato and carrots are tender.

Serve with rice, or if feeling authentic, a baguette - a Vietnamese one would be excellent if you can lay your hands on one (or make it yourself!).


Read More »

Monday, 3 October 2011

Sichuan Style Beef & Mooli Noodle Soup


I think I’ve made it fairly clear in previous posts that I love Sichuan food. Having a shelf full of Sichuan “store cupboard” ingredients such as douban jiang (chilli bean paste), Shaoxing wine (well, that's not actually from Sichuan but features frequently) and Sichuan peppercorns, I thought I’d try and come up with a soup recipe using these and a new favourite vegetable - mooli.

Mooli, also known as daikon is a large white radish which has a milder, blander flavour than standard small red radishes and is excellent when cooked for soaking up the flavours of the other ingredients, particularly meat.

I think I used some steaks, thinly sliced here but I think it would be excellent with cheaper cuts, cooked for longer. Regardless it is pretty simple, once you have the ingredients, tasty and restorative.


Sichuan style beef & mooli noodle soup
2 servings

265g beef, sliced into slivers
2 tbsp oil
½ inch piece fresh ginger, peeled, cut into “coins” each smashed with the flat side of a knife
1 large garlic clove, coarsely chopped
4 spring onions, finely chopped & half the green parts reserved for garnish
2 tsp chili bean paste (douban jiang)
2 tbsp light soy sauce
¼ tsp salt
1 whole star anise (plus ½ if you happen to have loose bits)
1 tsp palm sugar
½ tsp Sichuan peppercorns, tied in a muslin square
2 tbsp Shaoxing wine
2 baby san marzano tomatoes , each cut into 4 wedges
Freshly ground white pepper
90g noodles
150g mooli, cut into thin rounds
70g shitake mushrooms, thinly sliced
80g ya cai (preserved vegetable - I get mine in a small packet like that on bottom left here)
Chopped fresh coriander 

Bring a large pan of water to boil then add the beef slices. Return the water to a boil then reduce heat & simmer until the beef is just brown. This won’t take long. Drain then rinse the beef to cool and set aside.

Rinse out and dry the pan then add the oil over a medium high heat. Add the ginger and garlic and spring onions and sauté for 1 minute. Add the chili bean paste and stir for about 30 seconds. Splash in the wine then add about 1 litre of very weak beef stock, the soy sauce, salt, star anise, and sugar.  Mix in beef and peppercorns tied in muslin. Finally add the mooli & mushrooms.

Bring the soup to a boil then reduce heat to medium-low and gently simmer for 30 minutes.

After 30 minutes or so add the tomatoes and ya cai and continue to simmer for 15-30 minutes or until the mooli is cooked. Adjust the seasoning, adding more soy sauce, salt or sugar if required plus some freshly ground white pepper.

Meanwhile, cook the noodles according to package directions. Drain well then divide between large soup bowls. Ladle the soup over and garnish with chopped spring onions and coriander. 


Read More »

Sunday, 2 October 2011

Egg Curry


I bloody love curries of all descriptions and origins but I don’t think I have ever tried an egg curry before and I’m not really sure why. It seems that there are untold versions of this across Indian but I suspect that it’s origins are in the North. Mine I fell has a little more of a Southern bent due to my use of curry leaves.

It’s dead simple to make it, and an excellent choice for vegetarians and meat-eaters alike. Pretty healthy too really - you could mash half of the yolks into the sauce if you like while it is cooking, which will thicken the sauce a little but I prefer to try and keep mine intact. You could always completely remove half of the yolks entirely I suppose if you were feeling super health-conscious... but really that would just be silly wouldn’t it?


Egg Curry
Serves 2


2 tsp rapeseed or groundnut oil
4 eggs, boiled & peeled
1 medium onion, finely chopped
3 medium sized tomatoes, roughly chopped
¾ inch piece ginger, finely chopped
2 garlic cloves, finely chopped
1 tsp red chilli powder
4-5 curry leaves
1 tsp mustard seeds
1½ tsp cumin seeds
½ tsp turmeric powder
3 green chillies, chopped
1½ tsp coriander powder
½ tsp salt
75g frozen peas
2 tbsp coriander leaves, chopped
1 tsp garam masala


Heat  the oil in a fairly large  saucepan or sauté pan and cook the onions over a low to medium heat for about 10 minutes until translucent & soft.  Add  the ginger, chillies & garlic & continue to cook until the onions are golden and starting to turn brown at edges.


Add the mustard & cumin seeds and when they start popping, add  the curry leaves.


Add the salt, chilli powder, turmeric & coriander powder. Then add the chopped tomatoes and fry until they are broken down.

Add about 250ml water, bring to the boil then turn down to a simmer and cook for a minute.

Cut the eggs in half and add them & the peas to the curry. Stir carefully then put a lid on and let cook undisturbed for about 15 minutes.


Add the coriander leaves & garam masala and serve over basmati rice or with flat breads of some sort.


Read More »

Monday, 26 September 2011

Pasta con Broccoli


Sicilian dishes traditionally bring together Italian & North Africa culiinary traditions: the inclusion for instance of saffron, raisins and pinenuts in a simple pasta dish. In the Inspector Montalbano series of books, by Andrea Camilleri, the eponymous hero, in a fictitious Sicilian town, seems to focus as much on what he has just eaten or will soon eat as solving his cases, and in one of these novels is irate at being disturbed when eating a typical Sicilian broccoli pasta.

A cult dish then, arguably at least. A Google search for the same, as you would imagine, does not of course result in a definitive recipe but rather the consensus on ingredients does seem to be broccoli, pine nuts, raisins and saffron.

The recipe that follows is an amalgamation of those I found: not being a fan of fruit in savoury dishes (albeit dependent on the fruit and the dish) mine omits raisins.


Pasta con broccoli
Serves 2


1 tsp olive oil
150g cavatappi or other short pasta
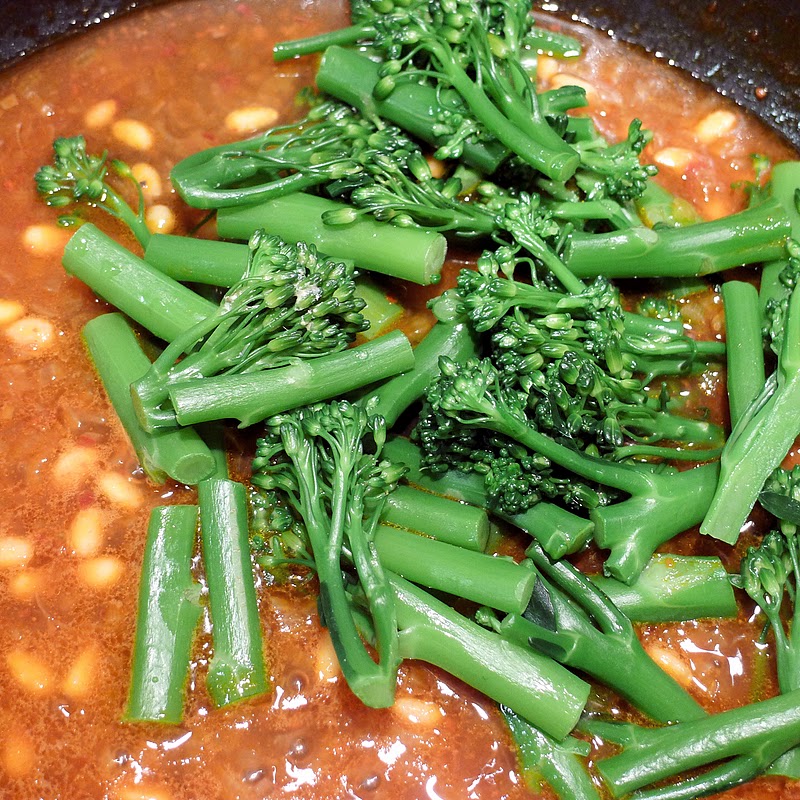
100g tenderstem broccoli, cut into florets & the stalks about 5cm long pieces
10g pine nuts
1½ anchovy fillets (preserved in oil), drained and finely chopped
sml pinch of saffron, soaked in a little hot water (from the broccoli once cooked)
1 banana shallot, finely chopped
1 tsp tomato concentrate
generous pinch red pepper flakes
salt and pepper


Bring a large pan of salted water to the boil and cook the broccoli fairly briefly - only a few minutes you want it cooked but still crunchy. Remove and set aside in a covered bowl. Keep a cup or so of (around 250ml) water to one side then return the water to the boil for the pasta.

Put the saffron in a small bowl and add a couple of tablespoons of the broccoli water - set aside to soak.

In a large frying or sauté pan fry the finely chopped shallot in the oil over a medium heat and when they have softened and started to colour add the chopped anchovies and cook for another minute or so until the anchovies have melted into the oil and shallots.


Add the red pepper flakes, tomato puree, and a cup of the reserved broccoli water, mix well and bring to the boil.

The water for the pasta would probably have returned to the boil by now so cook the pasta for at least 2 minutes less than the packet instructions - i.e less cooked than al dente.

Add the pine nuts to the sauce and simmer for a few more minutes before adding the saffron.


Let the sauce simmer for a minute or so and then tip in the drained broccoli. Mix together carefully but thoroughly.


By now the pasta should be cooked as per instructions above. Drain, mix in thoroughly with the sauce (season carefully with salt & pepper as needed), cover and turn off the heat. Leave for 5-10 minutes to let the sauce infuse the pasta. Serve with grated pecorino: as good quality as possible, or leave without.


Note: It has since come to my attention that “broccoli” in Italian recipes frequently refers to Romanesco broccoli which is likely what this recipe should be made with. Romanesco Broccoli is in fact the lime green cauliflower with pointy Fibonacci spiral florets. As I have just ordered some in my next veg box delivery I'll need to make again soon with the real thing  - I'll add some pics here after.

Read More »

Thursday, 22 September 2011

Gnocchi di Ricotta


I have long known that fresh gnocchi in a restaurant (particularly in a restaurant in Italy!) is approximately a billion times nicer than that bought pre-packaged in a supermarket. Light, velvety & pillowy as compared to heavy and a bit stodgy & claggy.

However I had totally bought into the old myth that home-made gnocchi have to be labour-intensive and time-consuming. It seems that is not the case at all and even better I read that ricotta gnocchi (a traditional Florentine pasta) is even easier to prepare and even lighter than the more common Northern Italian potato gnocchi: super quick too.

The gnocchi should be served as soon as they're cooked, so make sure you have your chosen sauce ready - I had some of my amazing ragu that I’d cooked up a big batch of ages ago in the freezer so I just defrosted and reheated that. A simple tomato sauce would also be good or a "deconstructed" pesto or even just sage butter.

Refrigerating the gnocchi for fifteen minutes firms up the dough and makes it easier to work with and the finished gnocchi freezes very well and will keep for one month. (After that, they're still safe to eat, but the "fresh" quality diminishes.) Spread the extra gnocchi out on a sheet pan and place in the freezer until the gnocchi are firm. Then transfer to a freezer bag or container. Frozen gnocchi can be put directly into boiling water to cook.

So here we are: recipe of my own but inspired by very many I saw online.


Gnocchi di Ricotta
Serves 3


250g ricotta
1 medium egg yolk
¼ tsp fine sea salt
75 g freshly grated Parmesan or Pecorino
50-75g plain white flour (I actually used 00 as I had just bought some) plus extra for dusting
freshly grated nutmeg

Discard any excess liquid that the Ricotta’s packaging may contain, then add the ricotta to a strainer lined with a muslin square. Leave to drain any excess liquid for at least an hour.


Add the drained ricotta, egg yolk, salt, nutmeg & pecorino or parmesan to a large bowl and mix well with a wooden spoon.


Add the flour and stir until just combined. It may be quite sticky - refrigerate for 15 minutes then check the texture. You want it a little tacky but not so much that it is just clinging to your fingers. Add more flour if necessary but don’t overdo it as more flour = denser gnocchi and you want these as light & fluffy as possible.

Refrigerate for a further 15 minutes.

When you are ready to shape the gnocchi put a large pan of salted water on to boil and start reheating your sauce.

Generously flour a board and your hands, take a squash ball size dollop of the dough and place onto the board. Dust with flour then roll into a middle-finger thick roll.

Dust a knife with flour as well the cut the roll of dough into little pillows about ¾ to 1 inch long - place each on a floured baking paper lined tray. Dust again with flour.

Repeat with the rest of the dough. Then make little grooves in the gnocchi by rolling them off the back of a fork with your thumb (you can just leave them as plain pillows if you like).

When the gnocchi are shaped and the water is boiling add the gnocchi and stir once, so they don’t stick to the bottom.  Cook until they start floating on the surface of the water - about 2 - 4 minutes depending on their size then cook for a minute or so more.

Drain and serve with a sauce of your choice immediately.


Read More »

Tuesday, 6 September 2011

Braised Beetroot With Sour Cream


Despite my beetroot bolting like mad I decided to try and cook with the last of it the other day, figuring that it was worth a go - at worst I would have to ditch it, at best I would have something yummy to eat.

I had some soured cream in the fridge, leftover from making beef stroganoff (which unfortunately I failed to take photos of) and had previously seen a Russian inspired braised beetroot dish online so opted to go for that.

The recipe that follows is adapted from that. It makes quite a lot as a side dish: the first day it accompanied a seasoned, pan-fried pork chop while the second day was alongside some boerewors (spicy South African beef sausages) and horseradish sauce as per the pictures.


Braised Beetroot With Sour Cream
Serves 2 very generously as a side


2 medium beetroot, peeled and cut into small cubes (wear rubber or latex gloves)
1 carrot, finely sliced
2 sticks celery, finely sliced
salt and pepper
1 tsp cider vinegar
50g butter
150ml sour cream
1 tsp flour
1 tsp sugar

Put the carrots, celery and beetroot in a heavy based pan. Season and add the vinegar and butter as well as just enough water to just cover the vegetables.

Cook very slowly (use a heat / simmer mat if necessary as you don't want the veg to catch on the bottom of the pan) for 45-60 minutes or until the beetroot is completely soft.

Stir in the flour then the sour cream and sugar. Make sure all combined and cook for a further 10 minutes.


Read More »