Showing posts with label Chinese. Show all posts

Sunday, 9 October 2016

Black Pepper Tofu


Very many years ago I acquired a tiny little recipe book (I think it may have been a Guardian or Observer giveaway) that had Ottolenghi’s black pepper tofu recipe in it (it can also be found in his book Plenty). It was granted a turned corner - the only time I ever turn corners in books is cookey books, though I am more likely to use those little strip post-its, elsewhere it is a crime against books and should be punished - but relegated to fairly near the bottom of a long list of ‘one day I will cook this’ recipes. Even when my friend Phil cooked and raved about it I didn’t get around to it.

So I don’t know what prompted me to cook it on this occasion. I wish I could remember.

I cut the chilli and black pepper quantities back from 4 & 2½ tbsp to 2 and 1½ respectively - we normally have no problem with spicy heat but everywhere I had seen people write this up on blogs etc they talked of how super fiery it was and as it wouldn’t be just me eating it thought I’d err on side of caution in the first instance. I also cut down the garlic & ginger slightly as well as the spring onions (all the ingredients are in large quantities!) and added some Sichuan peppercorns. Oh and of course I cut back on the the butter because 75g? That’s a hell of a lot of butter.

To be honest and in retrospect, I’m not sure that cutting ingredients and adapting is such a great idea with Ottolenghi recipes as generally speaking his ingredient quantities often seem excessive (and far out according to a lot of people for many of them but I quite like that) but by and large the recipes work despite any misgivings at the beginning.

But anyway this was still good. Very good. As it turned out I soon realised that I had been unusually & excessively timid with the spicing and we could have easily handled the original quantities of chilli and black pepper.


Black Pepper Tofu
serves 2


400g firm, fresh tofu, cut into 3cm x 2cm blocks
cornflour
vegetable oil
50g butter
150g shallots, peeled and thinly sliced
2 red chillies, deseeded and thinly sliced
4 garlic cloves, crushed
1 tbsp chopped ginger
1½ tbsp crushed black peppercorns
1 tsp Sichuan peppercorns, toasted & crushed
1½ tbsp sweet soy sauce
1½ tbsp light soy sauce
2 tsp dark soy sauce
½ tbsp sugar
6 small, thin spring onions, cut into segments 3cm long, plus some green parts shredded to serve


Toss the pieces of tofu in the cornflour, shaking off the excess. Pour in enough oil into a large frying pan so that it is at a depth of 0.5cm and heat. Fry the tofu in batches in the oil, turning as you go. Once they are golden all around, and have a thin crust, transfer to some kitchen towel on a plate.


Clean out the pan and add the butter. Once it has melted over a low-medium heat, add the shallots, chillies, garlic and ginger, and sauté for about 15 minutes, stirring occasionally, until totally softened.


Add the soy sauces and the sugar.


When the soy is thoroughly stirred in add the crushed peppercorns.


Warm the tofu in the sauce for a few minutes, then add the spring onion, stir through and let simmer for a few minutes to wilt the onions a little.


Serve hot with steamed rice and some of the shredded spring onion greens sprinkled over.


Read More »

Saturday, 11 June 2016

Taiwanese Meat & Mushroom Sauce with Rice


I’ve made a Taiwanese meat sauce before and in that recipe I mention that it can be made with chunks of pork, as that was, or with minced pork, as of course this is.

This is basically then a Chinese spaghetti bolognese, Taiwanese style and can be served over noodles, or as I have done here, rice.

I think that Taiwanese stewed pork is 滷肉, read as 'lu rou' in Mandarin and when boiled eggs are simmered in the sauce in this manner they are called 滷蛋 or 'lu dan'. How they come together as a name for the whole I’m not sure (and I have probably got it wrong anyway).


Taiwanese Meat & Mushroom Sauce
serves 1


100g minced pork
10g dried shitake mushroom, soaked and roughly chopped (keep the soaking water)
1 tsp dried shrimps (soaked and roughly chopped)
1 clove garlic, chopped
2 spring onions, chopped (reserve some green parts for garnish)
½ tsp five spice powder
2 tbsp sweet soy (I used kecap manis)
1 tsp light soy
½ tbsp Chinese black vinegar
1 small dried red chilli
1 tbsp Shaoxing wine
1 tsp sunflower oil
1 hard boiled egg, peeled
crispy fried shallot, to serve


Top up the reserved mushroom soaking water to 150ml and set aside.

Heat a wok and when hot add the oil and then the garlic and onion, stir fry for a couple of minutes till softened and lightly golden.

Add the dried shrimps and stir till fragrant and then add the pork mince, breaking it up into small pieces with the back of a wooden spoon. Keep stirring until the meat is almost cooked through and the wok is dry.

Add the wine and stir for a minute or so before adding the mushrooms and 5-spice. Keep stirring for another couple of minutes.


Add the soy sauces, vinegar and dried chilli.


Turn the heat up and add the diluted mushroom soaking water, bring to the boil and then turn down to a simmer and cook gently for at least 10-20 minutes (the longer the better as the pork will get more tender with increased cooking time). Stir occasionally and top up the water if necessary if it is getting too dry.

Add the egg.


Nestle the egg into the sauce for at least another 20-30 minutes, turning occasionally.


Serve the sauce over rice or noodles with the boiled egg halved and some spring onion greens and crispy shallots scattered over.


Read More »

Monday, 6 June 2016

Pork with Sichuan Chilli Oil Sauce


My 2nd recipe this week from the October 2014 issue of Olive magazine - moving from the Chettinad region of India to Chengdu in China and of course Sichuan cuisine: one of my favourites.

The recipes featured were taken from a cookbook called Hunan: A Lifetime of Secrets from Mr. Peng’s Kitchen. Confusingly the recipes therein are Sichuan in origin rather than Hunanese - the (co-)author, Mr Peng has a restaurant in Pimlico called Hunan, so-called it seems in homage to the man who taught him to cook, rather than the region.

Anyway, two recipes caught my eye - the first being for a Sichuan chilli “sauce” which to me resembled the chilli oil with sediment that I love to spoon over as much food as possible and then a dry pork dish, where the chilli sauce is used as a condiment.

The chilli sauce recipe makes quite a lot: which is fine by me as I poured the excess into a couple of little jars to keep and use as I like (edit: ahem - all now used up, which reminds me that I really must make some more), but you could possibly scale the ingredients down if you weren’t sure you would use as much as me. Be warned though it is FANTASTIC so if you do scale it down you may very well regret it.

You will also need to make some “garlic juice” for the pork marinade - simply crush 2 cloves of garlic and leave to steep in 100 ml of water for 20 minutes then strain and use the resultant allium scented water.

I was slightly disappointed by the pork but only in that mine didn’t look like the picture accompanying the recipe. I’m not sure why this was but I think it is down to one of 3 reasons (or a combination): I used quite a lot of oil in the frying but didn’t deep-fry as suggested; I didn’t dry the pork off as it came out of the marinade; I let it sit in the cornflour too long before frying. Don’t get me wrong, it was still delicious but didn’t have that hint of crispy batter that the pic showed.

But the sauce/oil more than made up that. Now to arrange a visit to the restaurant itself.


Sichuan Chilli Oil
Makes approx 300ml


4 tbsp dried red chilli flakes
200ml vegetable oil
2 tbsp Sichuan peppercorns, crushed
150ml chicken stock (you’ll use 6 tbsp + more possibly)
2 tsp tian mian jiang (sweet bean sauce or use hoisin)
2 tsp tomato purée
pinch of sugar
1 tsp white wine vinegar


Heat a wok and when it is very hot add one tablespoon of oil and the chilli flakes - be careful as there will probably be a lot of spitting and smoke. Not to mention sneezing.

As the chilli flakes absorb the oil add the rest of it, a tablespoon at a time until you have what resembles an oily paste. This will take 5-10 minutes.

The chilli flakes will darken considerably but be careful not to let it burn.

Take the wok off the heat and add the Sichuan peppercorns and 3 tablespoons of stock. Hold your nerve as it will sizzle and bubble up quite ferociously.


Stir through then put the wok back on the heat and add the sweet bean sauce, tomato purée, 3 more tablespoons of stock and a pinch each of salt and sugar.


Stir everything together well and add a bit more stock if you like but you need a thick yet runny sauce.


Finally add the white wine vinegar, stir through and remove from the heat. Reserve a couple of tablespoons to serve with the pork and carefully pour the rest (let it cool a bit) into a jar.


Pork with Sichuan Chilli Oil Sauce
serves 2


2 small boneless pork loin steaks, trimmed of fat, sliced into strips
100ml garlic juice (see note above)
2 tsp Shaoxing wine
2 tsp white wine vinegar
1 tsp Chinese 5-spice
2 tbsp cornflour
vegetable oil, for frying
1 long red chilli, finely sliced
2 cloves garlic, crushed
2 spring onions, sliced (the whole length, including greens)
a pinch of Sichuan peppercorns, crushed
2 tbsp Sichuan chilli sauce (as above)


Put the pork strips in a bowl with the garlic juice, Shaoxing wine, wine vinegar and 5-spice. Mix it all together well and set aside to marinate for 10 minutes.


Remove the pieces from the marinade and coat with the cornflour.

Heat a generous amount of oil in a wok and fry the pork until golden. When it is cooked, remove with a slotted spoon onto some kitchen paper on a plate.

Discard most of the oil and then quickly stir-fry the chilli, spring onion and garlic for a minute or so.


Return the pork to the wok and stir in the peppercorns and a pinch of salt.


Continue to stir-fry for another minute and then serve over plain rice with the Sichuan chilli oil sauce drizzled over.


Read More »

Monday, 31 August 2015

Yellow Bean Chicken


There are many types of bean paste available in Chinese cooking: chilli bean paste for instance (made from broad beans) as well as, of course, black bean paste. This recipe uses the most common type of bean paste made from soy beans - sometimes called yellow bean (although it isn’t actually yellow) or fermented bean paste it can, confusingly be sweet, salty or hot making it important to know which you're getting!

This recipe is adapted from one in Ching’s Fast Food, with changed made to quantities as well as the velveting method.


Yellow Bean Chicken
serves 2-3


500g skinless chicken thigh fillets, trimmed of fat & sliced
1 tbsp groundnut oil
150g green beans, trimmed & cut in half
5 shiitake mushrooms, sliced
sea salt & freshly ground pepper
2 spring onions, finely chopped
For the marinade
2 cloves of garlic, crushed
2 tbsp Shaoxing rice wine
2 tbsp yellow bean paste
4 tbsp light soy sauce
2 tbsp runny honey
1 tbsp potato (or corn) flour
1 tbsp water


Mix together the marinade ingredients and the chicken in a bowl then cover with cling and set aside for around 20 minutes.


Heat a wok over high heat until it starts to smoke then add the oil and swirl around to coat the sides of the wok. Add the chicken (and marinade) and stirfry for 4 minutes and then add the beans and keep stirring around briskly for another minute.


Tip in the mushrooms and keep stirfrying for another couple of minutes.


Check the seasoning and adjust carefully to taste if necessary then sprinkle over the spring onions.


Serve immediately with plain rice.


Read More »

Monday, 15 June 2015

Spicy Sichuan Pork Noodles


I think it is safe to say that this is not a pretty looking dish: in all honesty it looks beige and bland, and well, gloopy & bleurgh. But it tastes pretty good: of course I love pretty much all things Sichuan (well, maybe not intestines and the stranger bits of offal. I’ll give those a miss) so I would think that.

These are all things that are classed as store-cupboard to me but a trip to a Chinese supermarket (or an online shop) will sort you out. I think most larger normal supermarkets will stock most of the ingredients these days, with just the chilli bean paste possibly causing some problems. Speaking of which, what you are looking for contains broad beans: the 'beans' of the chilli 'beans'.

This is adapted from a recipe I saw on Good Food, an Australian food website.


Spicy Sichuan Pork Noodles
Serves 2


1 tsp garlic paste
1 tsp ginger paste
2 tsp Sichuan peppercorns, toasted & ground
½ tbsp chilli bean paste
1½ tbsp sesame paste
2 tbsp soy sauce
1 tbsp Shaoxing wine
1 tbsp groundnut oil
a handful of fine green beans, trimmed & cut in half if particularly long
250g pork mince
1 tsp castor sugar
75ml water
2 spring onions, finely sliced on the diagonal
200g rice noodles, soaked in v hot water for 5-10 mins until soft & pliable


In a small bowl mix together the chilli bean and sesame pastes, Shaoxing and soy.

Heat a wok until very hot. Add the oil and swirl around and then add the ginger & garlic pastes. Cook, stirring all the time, for about 30 seconds before adding the beans.

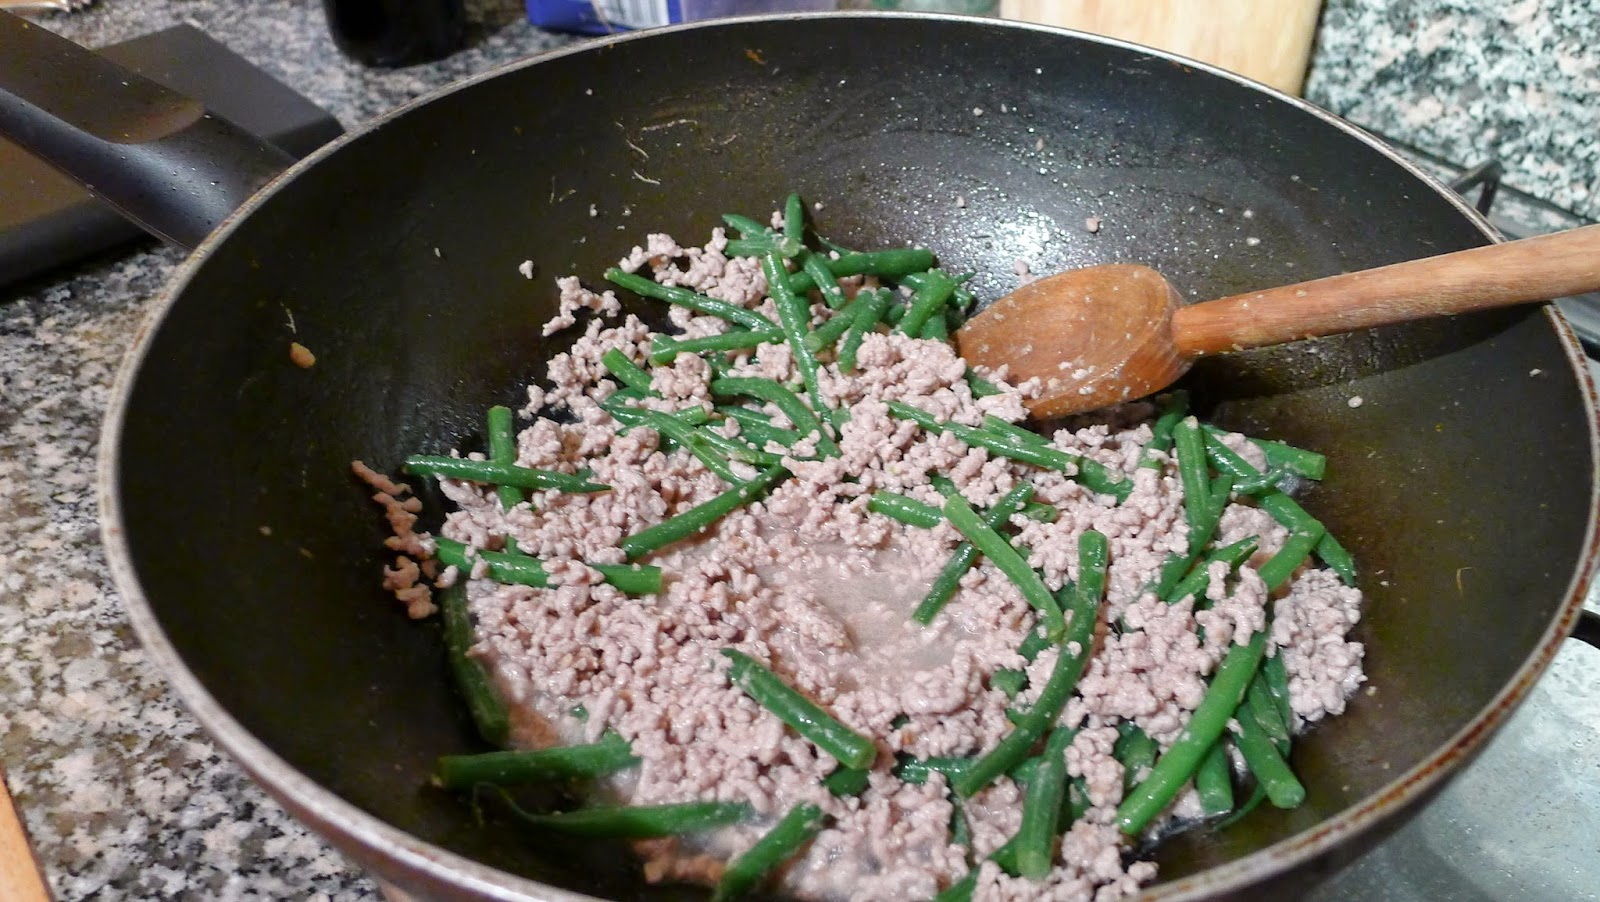
Cook the beans until just tender then add the pork mince.


Stir constantly and once the pork has lost its pinkness add about ⅔ of the Sichuan pepper as well as the sesame/soy sauce mixture and the sugar. Mix well and add the water, stirring well to combine.


Finally stir in the spring onions and rice noodles.


Serve immediately with the remaining Sichuan pepper sprinkled over.


Read More »

Monday, 5 January 2015

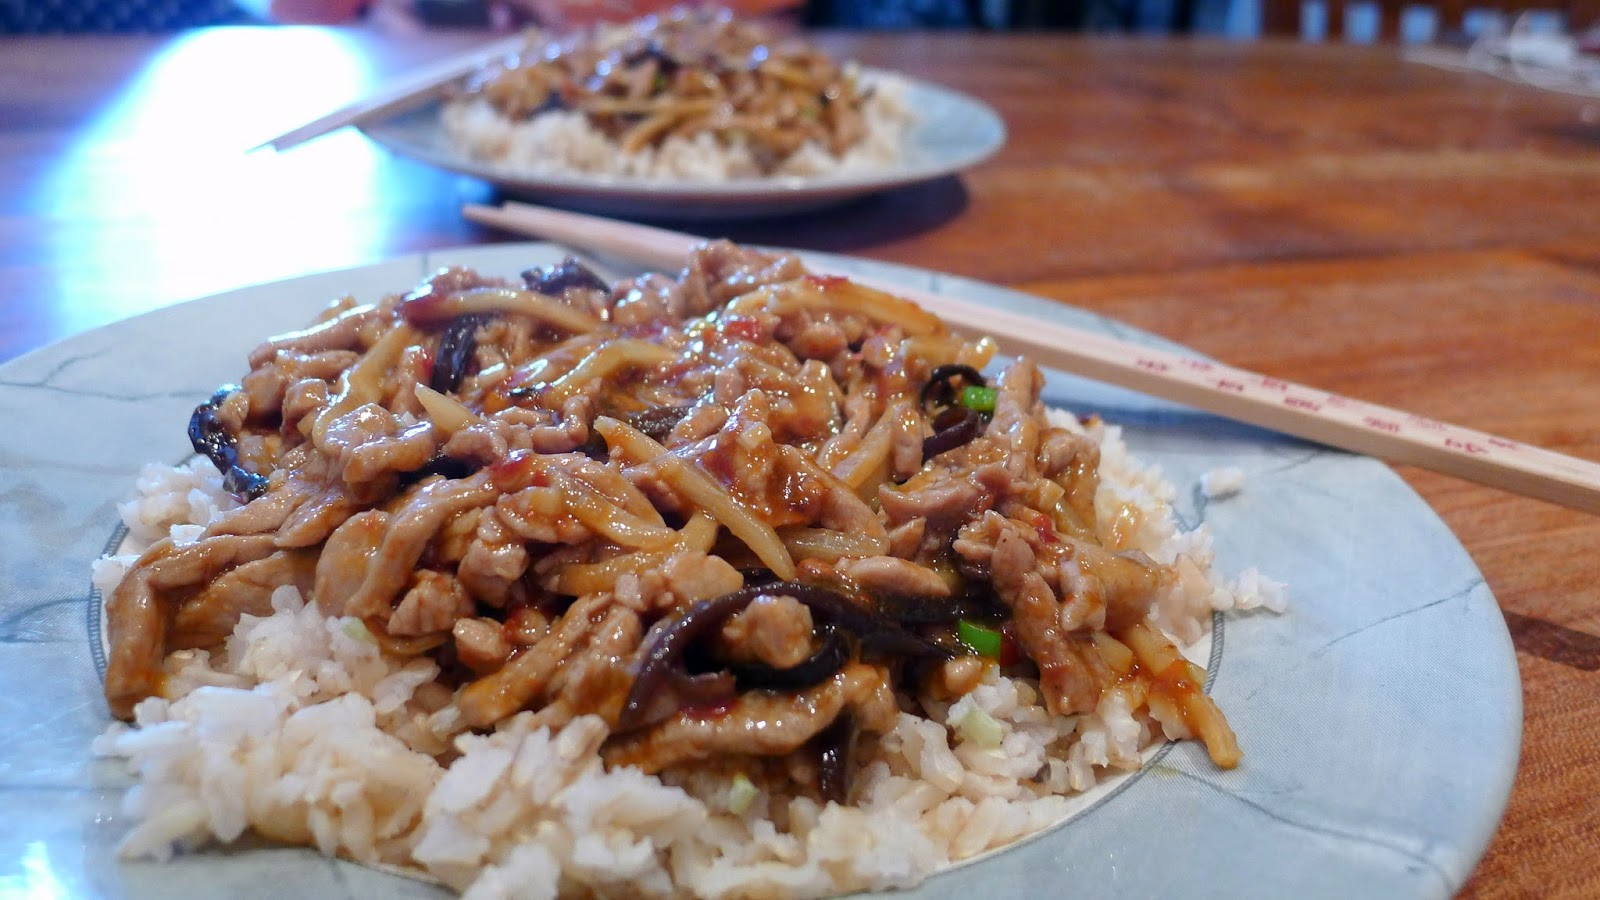
Fish Fragrant Pork


The mood took me, as it does occasionally (well quite often in fairness) for Sichuan food and so, as ever, I turned to my trusty, and slightly grubby in places, Sichuan Cookery by Fuchsia Dunlop.

One of the ingredients, pickled chilli paste, is difficult, if not impossible, to get here - the original recipe called for 2 tablespoons of it or to sub with chilli bean paste so I chopped some Chinese pickled chillies v finely with a cleaver until it pretty much made a paste and used half that, half chilli bean paste.

The dried cloud ear mushrooms I have are ready shredded but if you need to slice them yourself do so after soaking them and try and get approximately the same width and length as the pork and bamboo shoot strips (which incidentally I also often buy pre shredded) so all the slivers are approximately the same.

As I frequently do I’ve cut down the amount of oil used and then served over brown rice.

By the way, I’ve explained previously that fish fragrant doesn’t mean that this tastes fishy - see more here.


Fish Fragrant Pork Slivers (yu xiang rou si)
serves 2


300g pork, cut into long fine slivers
small handful of cloud ear mushrooms / black fungus, soaked & sliced
75g tinned bamboo shoot strips
salt
3 tbsp groundnut oil
1 tbsp Chinese pickled chillies
1 tbsp chilli bean paste
1½ tsp garlic, finely chopped
2 tsp ginger, finely chopped
1 spring onion, finely sliced
For the marinade
¼ tsp salt
1 tsp light soy sauce
1 tbsp potato flour
1 tbsp Shaoxing rice wine
1 tbsp cold water
For the sauce
1½ tsp sugar
1 tbsp Chinkiang black vinegar
1 tsp light soy sauce
¼ tsp salt
¾ tsp cornflour
3 tbsp water


Place the pork in a bowl with all the marinade ingredients and set aside for half an hour.

In a small bowl mix together all the sauce ingredients and again set aside.

When you are ready to cook, heat the oil in a wok until shimmering and just starting to smoke. Toss in the pork and stir fry briskly until the strips have separated. Push them to one side, tip the wok slightly to the other side and tip the chilli bean & pickle pastes in. Stir-fry briefly until fragrant and the oil is red.

Add the garlic and ginger and stir fry for about 30 seconds more before mixing everything together.

Tip in the bamboo shoots and mushrooms and stir fry until just hot.


Give the sauce a quick stir in the bowl and then add to the wok as well. Stir around quickly and then throw in the spring onions.


Stir around briefly and then serve over rice.


Read More »